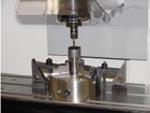
Tip: If the cylindrical surface has been machined, install a set of soft jaws on the chuck. The jaws are machined using an end mill until the exact diameter of the surface to be clamped is reached. It should be remembered that the chuck must be clamped when machining the jaws. It is best to use a bar or hex nut - just keep the jaws tight and leave space for the tool to cut to the desired depth. This can also be done if you are working on a soft jaw on a milling machine vise. The vise must be clamped before performing any machining operations.

Part II: <br> <br> disposed offset in many cases, CNC programmer in the Z-axis at the top of the zero setting procedure starting material. However, usually the surface of the material is not flat and is not completely parallel to any axis.
Tip: If you need to set the tool length offset from the top of the material and you need to get an accurate tool length value, you should gently pass the knife over the material. This allows the tool to be measured from a flat, clean surface. You can also set the tool length offset from the fixture for the fixed part and then gradually increase the Z-axis workpiece coordinate offset value until it is positive and equal to the part thickness.
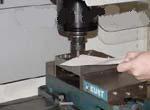
When setting the tool length offset, ramp the tool down towards the Z axis zero point. When approaching, insert a piece of paper between the tool and the workpiece. Carefully move the tool down until the top of the part - as close as possible, but the paper can still move. Switch to the minimum increment in the handwheel jog mode. Roll back and forth during the slow downward movement. You will start to feel the tension on the paper. Press the OFSET button, then press PAGE UP until you reach the CLNT (LENGTH) (RADIUS) page for the corresponding tool.

Place the cursor in the GEOMETRY column and move down to the tool number you are setting. Press TOOL OFSET MESUR. The control unit reads the Z-axis absolute machine position recorded at the bottom of the screen and enters it as the tool length for the corresponding tool number.
Tip: When setting the TLO (tool length offset), if the TOOL OFSET MESUR button is pressed, the absolute machine position of the Z axis should be recorded. Otherwise, the setting 64 in the control device should be turned off.
When setting the workpiece coordinate offset, you must accurately position the X and Y axes. Remember that you are measuring a spindle centerline and a position on the workpiece or on the fixture. If you are measuring the edge of a workpiece or fixture, the most common tool is the edge detector.
Previous Next
Foshan Nanhai Xin Jianwei Hardware Factory , https://www.aaghardware.com
